I started with the swell idea to rip off all of the old wallpaper, then when that didn't come off, removed teh raised portions of the typical 60's wood panels, then primer the walls, and cover them with this special panel-cover wallpaper to cover up all the unsightly ripples and water damage the previous owner had covered up with their wallpaper. I should have just re-papered right over the old stuff and saved myself a lot of time and trouble... but this is how it went:
So after trying to primer the walls to paper them, I decided to cut out the 'cancer' and replace it with a few sheets of 1/4" Luan I had. Here is an example of where the cancer was:
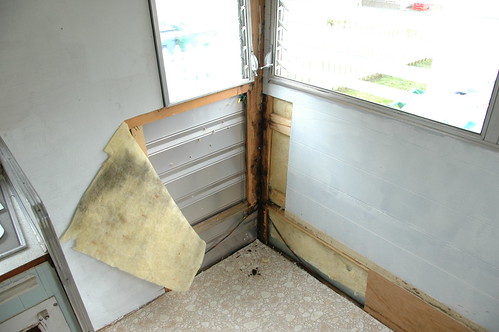
Well, the old walls didn't match the new walls too well. So I ended up just ripping the whole walls off, using the wall board as a template and cutting new walls out of the 1/4" Luan birch plywood.
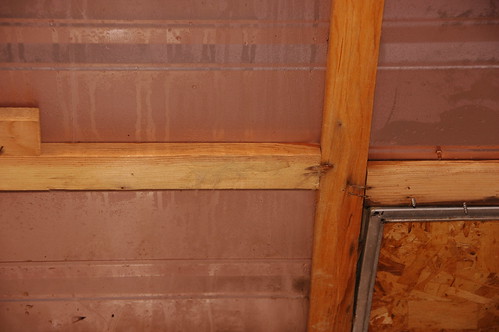
This shot shows you how these trailers are built, that's a 1x2 pine frame, the pink metal you see is the back side of the outer skin (white and red outside)
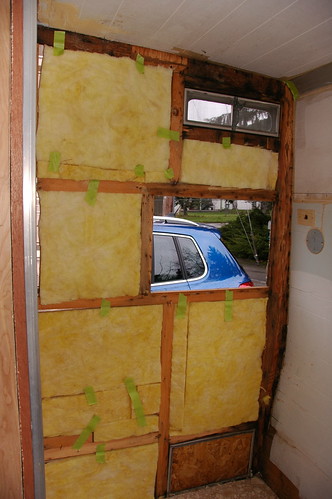
Then goes 3/4" insulation... this is 3 times more they put in here at the factory!! I used plumbing pipe wrap insulation. Lowes sells this for about $3 for a 18"x 6' roll(Home depot? over $5 for the exact same product - brand and all!!). Green tape keeps it in place for the siding to go up.
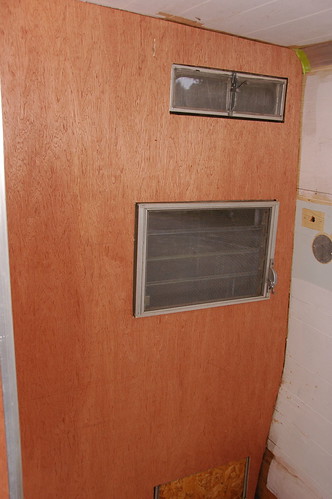
This is what it looks like with the wall back in place. This will be eventually painted "Tawny", kind of a sand/beige color we had used in our house remodel, I have a few gallons left over still.
All 4 corners were re-done. Each corner needed a lot of re-structure building and a lot of 2" brad nails toenailing the frame back together. They use a 5/8" x 1" staple to put these frames together... not the greatest over 40+ years.
Next up, new countertop and table formica.

No comments:
Post a Comment
Your comments are welcome! Please include your name in the comment as you will only be shown as "Anonymous" and I need to approve all comments efore they are posted. If I don't know who posted the comment, I won't post it to the blog. Thanks for the comments, they are appreciated!