Monday, June 22, 2009

The 2nd trip, this time 2 nights

We headed up over 2 mountain passes (Snoqualmie and Blewett, and a 3rd on the way home over Stevens to make the "loop"). The brakes worked wonderfully! Finally got the controller wired up and mounted on thursday night. Anyways on to the pics!

DSC_5099

DSC_5100

Simplicity

Wenatchee River 2

Making Friends

Storm Blowing Over

Sunday, June 14, 2009

Bearings and Brakes

I hooked my trailer up to my friend Dave Meister's truck to try out the brakes a couple weeks ago before I tried to install the electric brake controller I bought and nothing. The controller didn't even see the trailer was back there. :(

Well, I finally sat down today to figure it out, and repack the bearings while I was at it. The bearings are in great shape, and they looked to have been packed fairly recently... Better safe then sorry, so I cleaned them up and repacked them full of Mobile 1 full synthetic grease.

More good news, the brakes are in fantastic condition too, probably 75-80% shoe life left, magnet is in great condition too... They will lock up just fine right at the backing plate when I jumped 12v down to them... but when I tried it at the plug, nothing! So, I dug into the plug.

Sure enough one of the previous owner somewhere along the way CUT the positive and negative lines about 3-4 inches back into the wire loom. These, along with another black mystery wire were hacked off in their prime. Well I figured, why not, and cut ALL of the wires and rewired the whole plug to include the + and - trailer leads.

Now, both sides are adjusted properly, they lock up tight with 12v jumped at the plug now. The bearings are repacked and ready for a hot summer trip, and now I just need to wire up my brake controller and we're ready to head over to Leavenworth next weekend to meet up with about 600-700 Audi, VW, BMW and pretty much all European Cars in the 9th Annual Leavenworth Drive. Can't wait to go camping again! We are heading out a day early (like we did for the Port Townsend Drive back in March, the only other time I've got to go camping so far!) but this time we are staying 2 nights.

About the Drive: http://forums.vwvortex.com/zerothread?id=4244755

Where we're staying, #7 over by the playground. I got the last 20/30amp full hookup site, and I got 15% off for both nights by being really nice and asking the reservation lady to extend the Spring Fling one extra night for me. Supposed to have ended 6/20, which would have only gotten me 1 night (19-20th) at 15% off. :)
koa map

More new paint!

So I finally broke down and painted the wheels, including the spare, polished the baby moons and put the new tires on there. Not sure why I waited so long for this!!

DSC_4983

DSC_4978

DSC_4982

Oh, wait I know why... because the new wheels didn't match the orangeish pain on the stripes... so I had to repaint the stripes too!
New Paint 2

DSC_4960

And I hit the tanks with a quick coat while I was at it... they just wouldn't come clean and the tounge needed some color.
DSC_4984

here you go, before:
DSC_4699

After!! :)
DSC_4993

Saturday, June 13, 2009

More work done...

In addition to getting the cushions back, I also rebuilt the front rock gaurd/awning. It had a bit of a flexing problem before, if you don't remember or know what I'm talking about see below,

DSC_2773

so I drilled out all of the rivets holding the poly carbonate to the frame, and popped them from the other direction this time for a more finished look. Also, I riveted in a 3/4"x3/4" L-bracket right behind the floppy 1.5" piece I put for more show than go.

Now, the awning is very solid, and has ZERO flex like it did before.

DSC_4991

DSC_4987

Here's a few exterior shots, before I paint it, soon!

with my Talks-A-Mile-A-Minute genius Son
DSC_4697

and with the spare tire (not to be used as a real spare) on the back. I'm thinking of mounting this under the trailer instead of on the back... I dunno yet, but I may add a 2" hitch reciever on the back as well to put the bike rack on there... so when I build that, I might as well make it a spare tire holder too...
DSC_4700

Friday, June 12, 2009

Sorry... didn't mean to leave you all hanging. Finally the cushions!

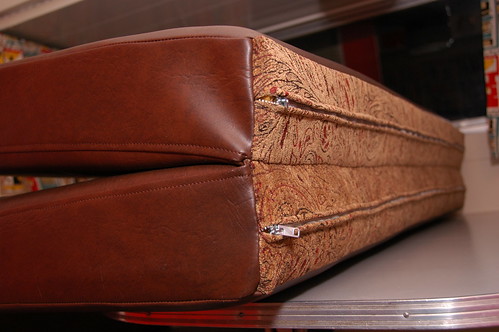
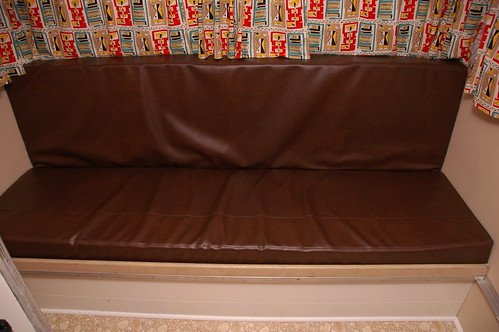
First off let me say THANK YOU DAD, I LOVE THE CUSHIONS!!!!

He was stitching these up right after a knee surgury that didn't go so well (still hurting a month later), so I know that hurt to sit there and work on these, so thank you Tim Blumenstein, of Perfection Interiors 41+ years of experience in Auburn Washington, who can be reached at 253-833-4386. Tell him you saw his work on my blog. (I know, shame-less plug!) 
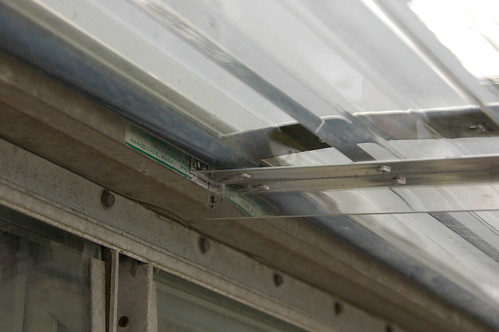
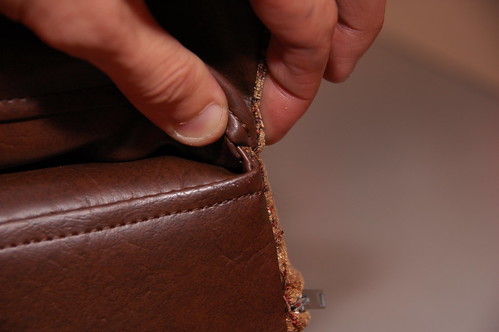
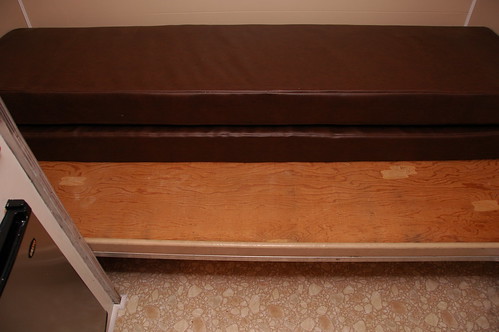
he also did another Aristocrat's interior too.

Let me explain these as we go... vinyl, or leather can blow out your seams if you sit down too fast and you have it all stitched up nice and tight... the air has no where to go so rapidly and will pop the seams like a balloon. So to remedy that problem we put a complimentary breathable fabric along the rear to create an expansion chamber to allow the foam to push and pull the air in and out without damaging the seams, even if you plop down too fast. This is also sometimes done with grometed holes... but I think this looks much better.
DSC_4919

By stiching these together at the top seam, it does a few things:
DSC_4920

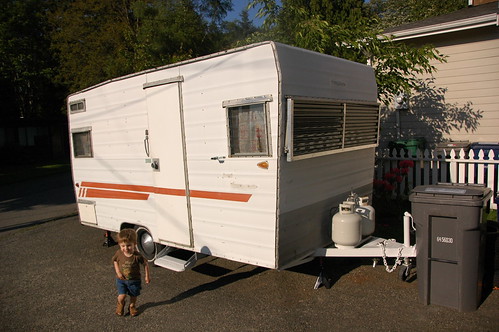
1. keeps food and grime out of the cracks (remember, there is a 2 year old that camps with us) :)
DSC_4922


2. creates a 5" x 5" air channel behind the seat and below the back when it's in sofa form.
DSC_4921


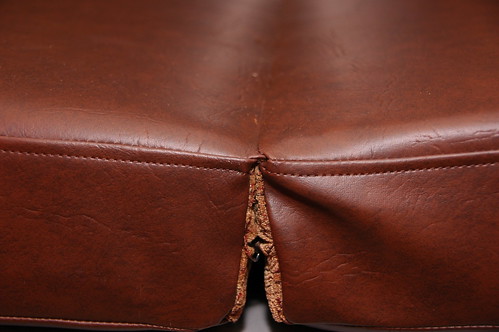
3. Keeps the bed flat and together at night.
DSC_4923

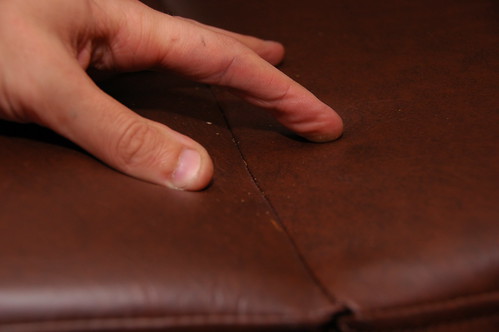
I copied my sofa in my living room for the design, boxed ends, single top stitched all edges and a single top stitch seam 6" back on all 3 seat cushions for looks.
DSC_4926

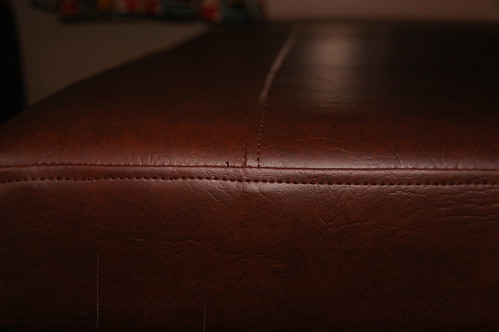
Free Uphulstry Lesson: The Single top stitch is 6x stronger than the dual stitch you see on your expensive leather interior in your car, and 3x stronger than a simple hidden reverse stitch. The dual top stitch is all for show, and is actually a weak seam that is bound to fail and tear apart sooner than later. The single top stitch is done like this; you sew the two panels together, then flip both edges over to the one side and stitch it again going thru all 3 layers including the "top" that is shown. So not only do you run the first stitch, you double up thru all three layers for the second stitch, and in doing so you relieve the stress on the 1st stitch by running the 2nd. Now not only are you holding 3 layers together for a strong seam, the other panel's seam does not have the same pull tension it would if you didn't top stitch it it is now pulling strait on the panel and not on the 1st stitch.

Now, in your car, they do the same first hidden stitch, then individually flip each edge back and stitch it to the same panels to create the "dual" top stitch to make you feel it's really, really sewn together and strong. Wrong. Here in lies the problems;
1. the 2nd runs of stiches do NOTHING to strengthen the 1st seam, you actually make the seam weaker by punching unnessesary holes in your fabric/leather.
2. Now with all that fancy stiching done, you are still relying on a single, stressed to the max seam to hold the two panels together. They pull those flaps back nice and tight to give it a sturdy look, but they are pulling against the seam, not relieving any pressure like the "single" top stich did. So just for that fancy dual stiching that everyone from VW to Bentley, BMW to Rolls Royce, Toyota to Lexus (you get the point) use in their cars is actually a very, very weak seam. This seam will eventually tear out (look at any 200k+ mile leather car interior.) :)


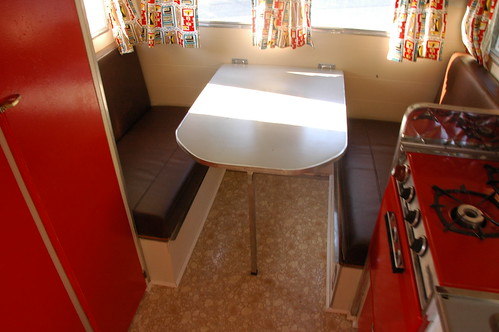
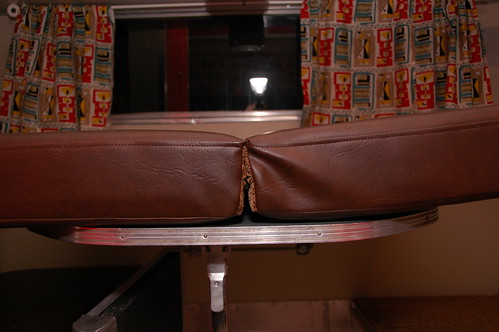
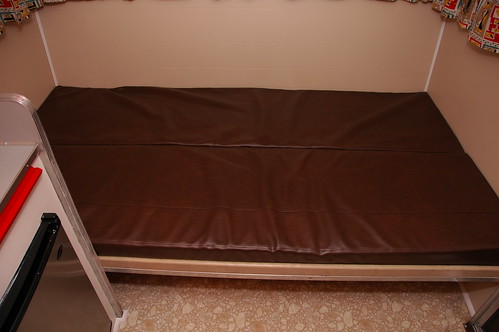
Okay, off the soapbox and now onto the sofa, here is the break down from sofa to bed.

Sofa: (needs thicker, better foam and poly wrap... kinda loose right now)
DSC_4941

Fold the back forward (attached)
DSC_4942

Pull the bed out (mine pulls out from under the other one so the cushion doesn't move at this point yet)
DSC_4943

Slide the cushion forward
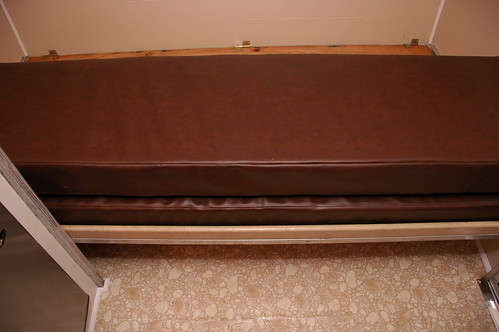
DSC_4944

Fold the back flat
DSC_4946

and that's it!

DSC_4701

Search This Blog