Tuesday, August 10, 2010

Yay, the Next Trip

We'll be taking the Mainliner out for it's LONGEST trip yet, a whole week!!

We Plan to head North to Deception Pass State park for two nights, then head east over the North Cascade Loop to Pearrygin Lake State Park for 4 Nights, then back home. I can't wait!!

Here is our planned route, if you see me, wave!

Monday, August 2, 2010

Down The Home Stretch - bringing you up to date.

So, I have been neglecting the blog again, sorry. Let me bring you up to date again. Since the last post we now have a bathroom, dresser, sofa and lots more storage. I built a folding bunk bed and an overhead cabinet to house the microwave, stereo and mini-bar. Everything inside has been repainted, again, I went with a darker wall color then last time, and a semi-gloss for the food splatters and hand prints.

I had my dad re-stitch the sofa cushions a bit smaller this time, it's not 80x39". The porta-potty is living in it's new home in the bathroom/closet. I wired up a International Cab light as a porch light and got that all wired in place with a switch on the side of the new overhead cabinet. Oh, and I swapped out the tires for some 185R14 8-ply LT tires, 65psi in these should dramatically change the towing now.

I'm finally heading down the final stretch and will be doing a bit of trim work tonight to make it pretty, but for the most part, we are pretty much done! I could go camping right now and be just fine with the status.

here are the latest and greatest pictures.

(Edit 8/10 Better Quality Pics)

DSC_3807

DSC_3806

DSC_3805

DSC_3797

DSC_3887

DSC_3851

DSC_3843

DSC_3848

The new 12v porch light
IMAG0485

and at night... this is the cab light I bought at the antique store up in Lynden. It works!
IMAG0514

Tuesday, July 20, 2010

Wiring is now done.

So, I was able to get all of the initial writing done last night. The new outlets above the dresser, where ther new overhead is going, and the exterior outlet are all wired up and working. Nice to have the lights back on inside.
I was able to put the stove back in place again, clean up a bit and it's starting to look liked a trailer again! Not too much more to do before it's campable again, just need to build a few more things, paint and trim. No new pictures yet.

Monday, July 19, 2010

More Progress: Dresser is almost complete, Sofa/Bed frame is completed, Made the bunk folding, mounted the Porta-Pottie and added a porch light

Wow, okay so busy working on it (Among other things, of course) haven't had a lot of time to post updates, so here's what's happened in the past few days (week?)

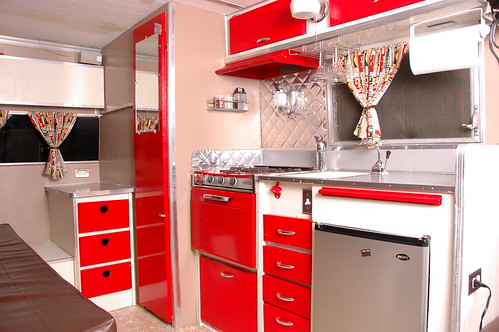
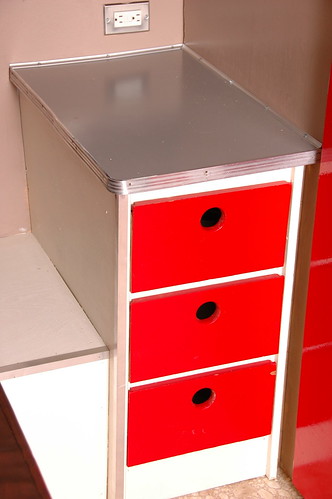
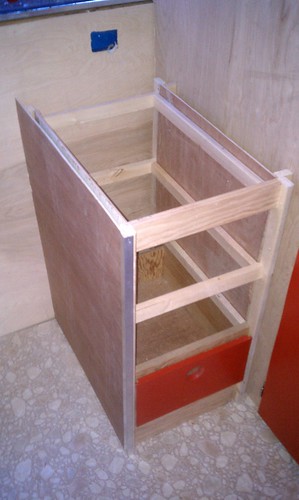
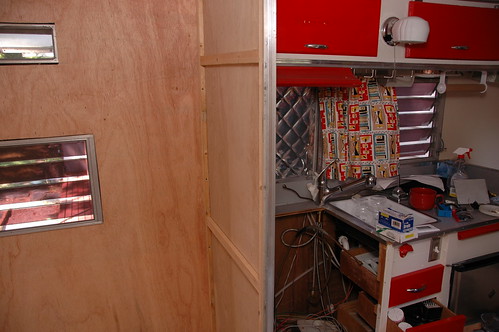
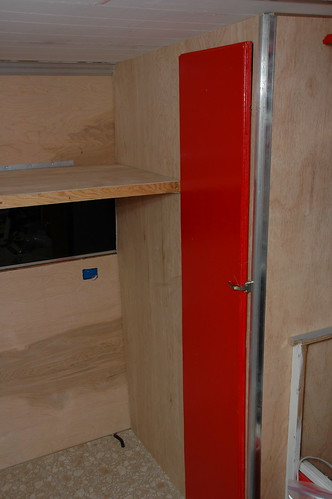
I built the dresser, so it will now house the 3 drawers from the old closet. I just cut the new top today, but need to round the corner, add the Formica to match the table and kitchenette, and add some trim before I install it on top.

IMAG0466

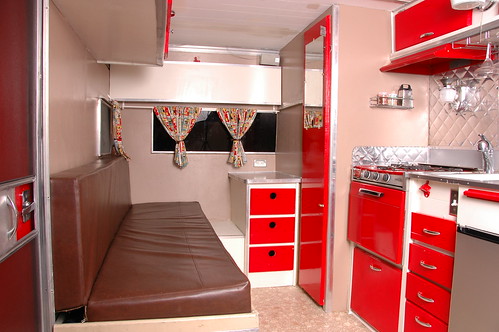
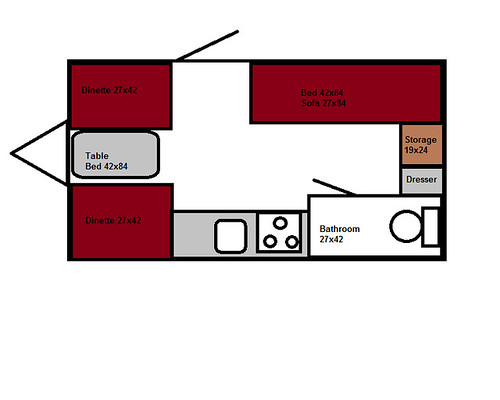
Then I proceeded to start building the sofa and storage unit. Funny part about this is I just kinda built it as I went... kinda winged it, and it turned out great. So I built a base that was 23"x79" with a 13.5"x20.5" storage spot in an "L" shape. Sort of like this:

Crude Plans

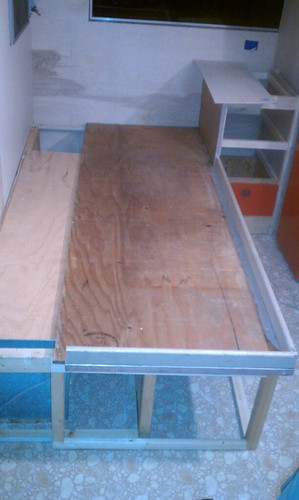
but ended up looking more like this (this is pulled out as a bed):
IMAG0475

I didn't take any real "after" pics yet, I'll take those tonight and re-post tomorrow. Where it sits now is along the rear wall, on top of the base, is a 13.5"x20" piece of 5mm plywood stapled to the top in the corner, and a 13.5"x20.5" piece right off the dresser. Then a solid piece at the foot of the "L" storage unit. The other two foot sections of the remaining 23"x65" base are open (Along with the section that is still open along the back wall) to give interior access to the storage under the couch. The rear is also accessible from the outside door.

Oh yea, I made the couch 16" tall instead of 12" like the Dinette (that is limited by the table leg length) so it's easier to sit and get up from, and the sub woofer can fit under the couch now. The cushions already needed to be shortened to 80"x40" (currently 84"x44") so I'll just have him take the width off the back, leaving the seat 22" deep.

So when the sofa folds out into a bed, you just pull the Lip and the bed slides out off the base to meet the dresser and voila!

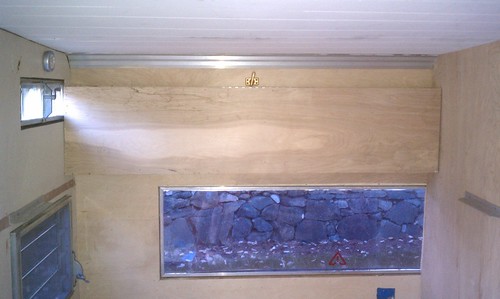
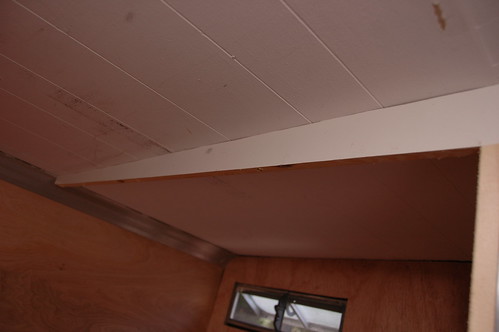
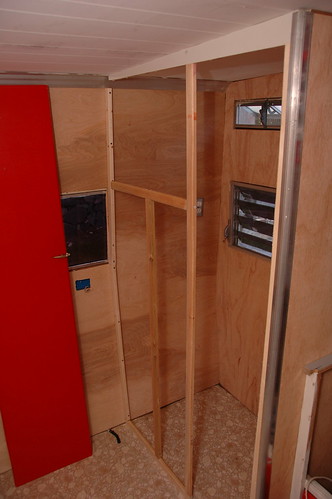
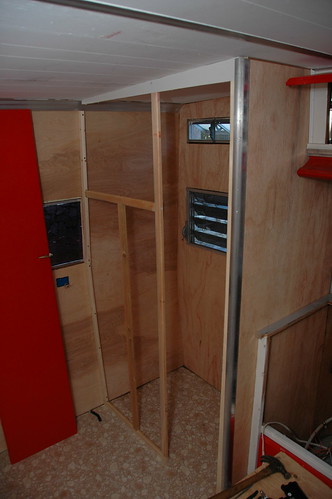
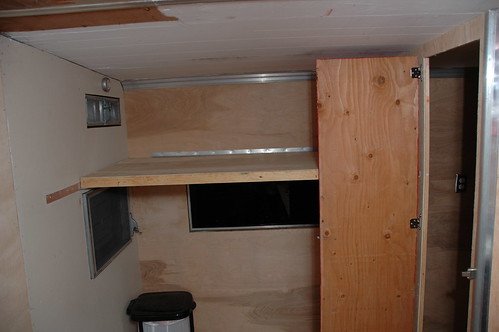
Next up was a re-visit of the Bunk (edit: Bonk) Bed. I took it down, cut it in half added two 1x2's and a couple of hinges and now the bonk bed fold up out of the way a lot better than it did with it being solid. I took out the small brackets and cut the old brackets down to size so they are now fully supported again. I also dropped it back down to just above the windows, to give my son as much room as possible.

IMAG0467

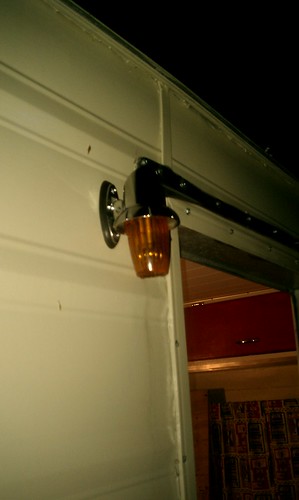
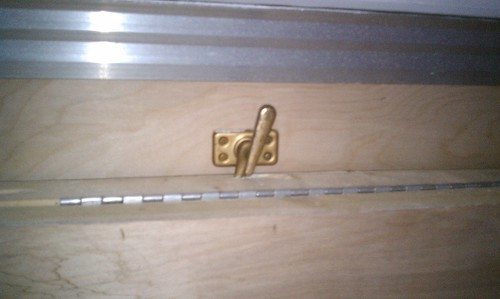
Here is the mount that locks it out of the way for travel and durring the day.

IMAG0474

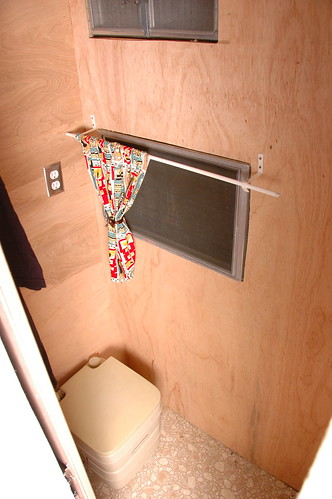
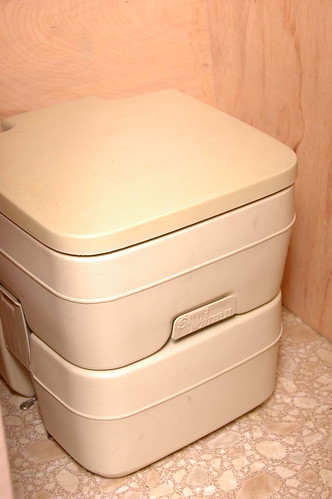
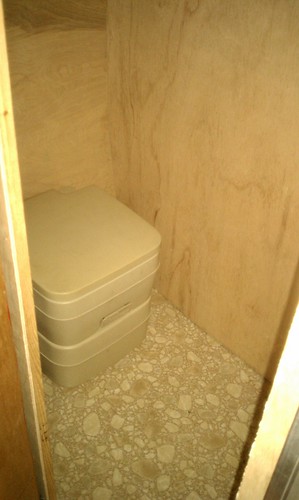
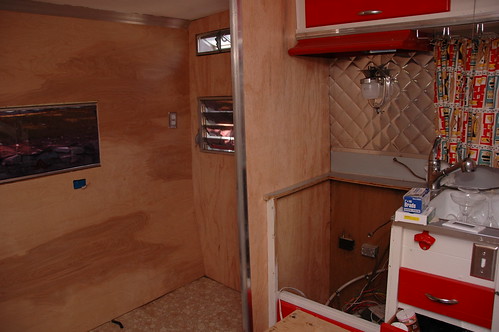
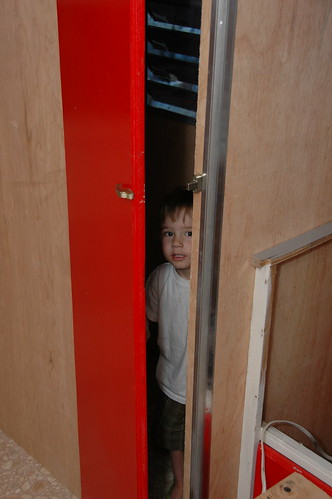
I mounted the Porta-Pottie in the bathroom, so that's ready to go now.

IMAG0480

And last but not least, I installed a pretty unique porch light. :) I found this at a antique shop up at the Lynden Vintage Trailer Rally last year, I assume if it truly is vintage/antique, it has to be NOS as it's brand new. It's just an International truck's cab light. I thought it would look great as a porch light. (going to need a new 12v battery, or this isn't going to do much! :) ) This will be controlled by a 12v rocker switch on the side of the overhead bin (yet to be built).

IMAG0485
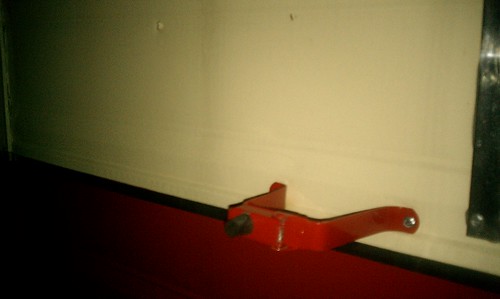
oh, and I re-hung the door, and painted the door stop red to match... the Rust color wasn't very becoming.

IMAG0488

Monday, July 12, 2010

We have a Bathroom!! (and a "Bonk Bed")

Okay so after a quick 30 miles ride this morning with my brothers, I got some work done on the trailer. My now 3 year old son and I got some good progress today. My goal was to just get the bathroom walls and door up, but we built what he calls a "Bonk Bed" (Bunk Bed, of course). Funny thing is he's so much taller now than when we first got the trailer, first thing when he got in there was sit up and "Bonk" his head... so I think the name will stick.

So, I built the 27"x76" frame for the wall off the kitchen first, adding extra supports at 36" and 63" for the counter top and the overhead storage. I added the 5mm plywood to the back, (stapled on) and put it up in place. I needed an extra 1/2 inch to make it sit tight, so I cut a 3/4" strip out of 1/2 plywood and nailed it to the floor as a footer, then wedged the wall on top of it. Then I added the halfway polished corner bracket (from the original closet).

for the other wall, I screwed 2 1x2" firing strips on the wall 38" each to follow the shape of the rear wall, then a strait 72" piece for inside the corner frame. I also added another 1x2" along the floor. For the top piece, I cut the former 1x4" piece from the center of the closet into an 3" to 3/4" 42" long angle. This created a level header for the door frame (at 72" tall). I added a cross piece at 55" to mount the "bonk bed" brackets, and a 1x2" stud as support. Then I cut and tacked up another piece of 5mm plywood to create the outer wall. This time I used 3 self closing surface mount brackets to mount the now Shorter 72"x16" door (Previous closet door, of course). I recessed the handle a bit into the door, and added the clasp to the 1x2" frame. Done. (yes, you can only close or "lock" the door from the outside, hence the self closing hinges... it will close on it's own.)

For the "Bonk Bed" I made a quick frame of 2x2's 55"x26" with a support in the center to support the weight (Should be good for 100-150 lbs at least, but only weighs about 10-15lbs, a LOT lighter than the 150lb 1" solid plywood old bunk 42"x84" platform) I added more 5mm plywood to the top, added the two old sofa bed supports to the walls, and a piano hinge to the rear, and presto! A fold-a-way "Bonk Bed"

and the pics:

DSC_3563

DSC_3562

DSC_3565

DSC_3571

DSC_3574

DSC_3575

DSC_3581

DSC_3582

DSC_3584

Thursday, July 1, 2010

Finally finished the Tinting, and interior progress

So I got the Windows tinted last night, and just to show what has come along with the interior... ready to start building the bathroom walls and door, upper and lower storage and bunk, paint and camp... right? Almost... well here is the pics of the progress.

The Red wheels are off due to clearance issues in my driveway with the P195/70/14 tires I put on there, they are off to swap out the tires, they WILL go back on with taller (6-ply) trailer tires soon.

I have most of the day Saturday and Friday night to do some more work, so hopefully there will be some progress this weekend!

IMAG0275

IMAG0279

IMAG0400

IMAG0401

IMAG0402

IMAG0403

Monday, May 17, 2010

Window Tinting...

So I tinted the windows, or at least started to this weekend. Go the rear windows done so far. Just using 5% VLT film I bought at the Local Auto Parts Store, rear window was done in place, the two side windows were removed and done inside. New felt seals and anti rattle holders were put in too... no more window clatter.

DSC_2917

DSC_2921

DSC_2924

This was done for a few reasons...

1) Duh, it looks bad-ass! :)
2) Keeps the interior a bit cooler in the summer
3) darker inside for daytime naps (3 year old)
4) Blocks UV rays, my wife had Stage 3 Melanoma 10 years ago... want to keep it that way.
5) keeps the curtains looking new, no fade from the UV rays
6) Needed to hide the new interior wall - about a foot of the rear window will be blocked by a new wall inside for the bathroom. (Port side)

Sunday, January 24, 2010

wow... finally bringing this blog back from the dead!

You would not believe how much hassle that is to add a new gmail account to a blog. Not as simple as I thought. But finally figured it out. So now the blog lives on!

I Dropped Comcast as my ISP when we made the move to Bellevue in late November, and couldn't get signed in for a while there. Little fancy switching here and there and poof, it's alive again.

Update: Nothing. The trailer has a new 14x30 foot flat slab to sleep on, and that is about it. She's plugged in, winterized and waiting ever so patiently.

Plans for the spring are to rip back into the interior, reconfigure a few things for now... Just planning to get the porta potty in it's own "bathroom", I'll worry about holding tanks, sinks and showers later. For now, it's just a bit of re-arranging to get ready for the trip to Yellowstone in Late July/early August.

A couple new 6-ply LT 195/75/14 will go on very soon so I can actually get it back out of the driveway without scraping. The Passenger rated 195/70/14's are just not cutting it anymore. Too low and sidewalls are bulging under the weight of the trailer now. finishing polishing the windows is still in order, along with some ever so needed tint to keep interior temps down and preserve the curtain fabric. The rear window will be extra dark, especially because I will most likely wall over the section where the bathroom will be. I'll keep the other two windows, but the rear will be tinted, then covered up for a cleaner look inside. I can't wait until I can start working on it again... just need to get some funds saved up and then I'm off and running.

Search This Blog